Bloggers know that while reviewing sites, screenshots are highly useful in giving references. Instead of typing “click on the little OK button towards the top right of the screen” one can easily take a screenshot and show the readers what exactly is being written about.
If you’re a professional blogger or have a similar job that requires you to take screenshots all the type, then the traditional method of pressing the ‘Print Screen’ key and then pasting the image in MsPaint might not suit you best. Sure that basic way doesn’t prove to be problematic while working with a few screenshots now and then but it can prove to be quite time consuming when the number of screenshots increase.
To cut back on the time it takes to work with screenshots, FireShot comes into play.
FireShot is a free browser add-on compatible with Firefox and Internet Explorer. For Firefox, you can download it here and for Internet Explorer, you can get it here.
This nifty little thing lets you copy and edit the visible area in your internet browser. In Firefox, the FireShot button can be found in the top right, next to the search bar. In internet explorer it can be found on the left, right under the address bar.
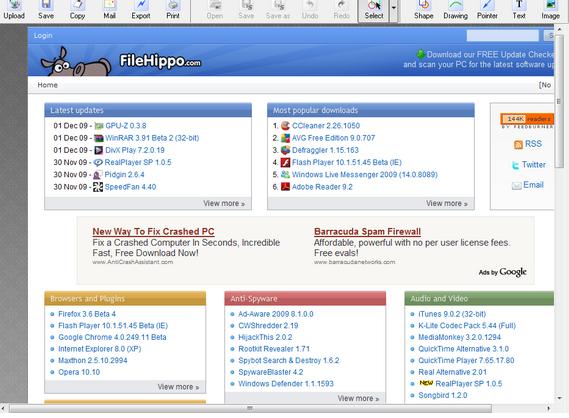
To demonstrate how FireShot works, we shall use Firefox to open up Filehippo’s homepage (a great site hosting many letting users know when updates to popular programs are available). This is how Filehippo loaded in my browser:
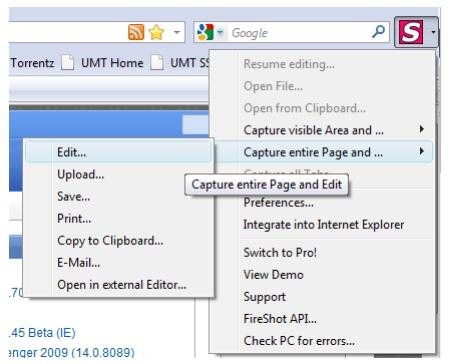
If I take a screenshot by pressing ‘Print Screen’ only the visible area of the page will be captured. However using FireShot I have the option to capture either only the visible area or the entire page. I want to work with the entire page so I click on the arrow next to the FireShot button and edit the entire page:
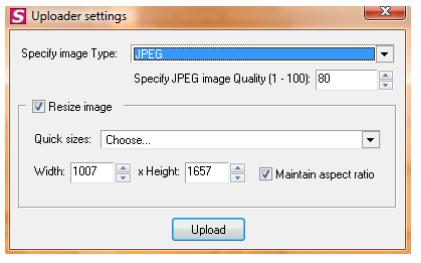
You have a lot of options in this menu: upload the entire image, save it, print it, or copy it to paste it somewhere else. If you choose to upload the image you will be required to specify the dimensions and format:
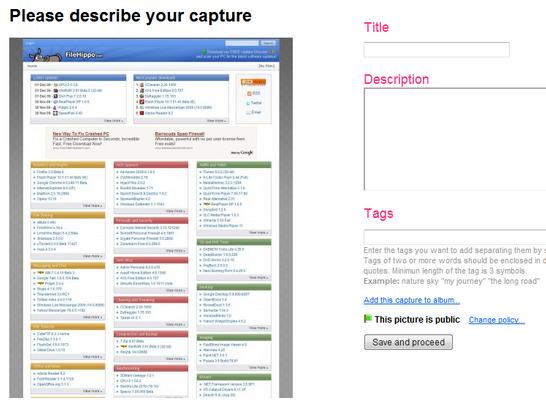
The resultant image will then be uploaded to EasyCaptures (a website created by FireShot’s developer) on which you can create a free account. Here is how my image looked on this image hosting site:
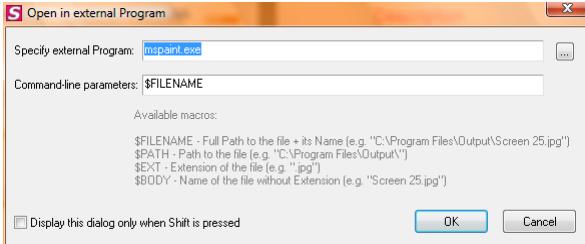
That covers the uploading. You have two options as far as editing your image goes: you can either choose to edit the image in FireShot’s own image editor or use an external editor of which the path you will have to specify:
Here’s how FireShot’s editor looks like:
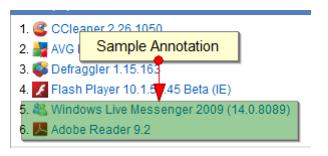
The available functions in this editor make it quite competent. You can even add annotations and mark the area they belong to:
While the functions present in this image editor are great, there is one drawback. While the editor is open, you cannot access the browser. So it becomes necessary to finish up your editing, copy/save/print/upload the final image, and close the editor if you want to use your browser.
Until the developers of the add-on fix this problem, you can walk around it by using an external image editor which you are familiar with.
Compatible with two of the most popular internet browsers, this great add-on provides tremendous convenience to the blogging community; although we do hope FireShot’s one minor issue will soon be resolved. However, even with that tiny issue present this 1 MB add-on enhanced your browser and is a must-have for all bloggers or people whose jobs require them to daily deal with screenshot editing.
We use cookies to ensure that we give you the best experience on our website. If you continue to use this site we will assume that you are happy with it.OkPrivacy policy


Awesome thank you. theres way to may people trying to sell screenshot software.